Installing Proxy Manager as an Azure Active Directory application does not install the Outlook add-in on client machines. You still need to install Proxy Manager locally.
Proxy Manager must be registered as an application in Azure Active Directory. The tenant id, client id, and related configuration values are then stored in the Windows Registry on the machine where the Proxy Manager Outlook add-in runs.
1
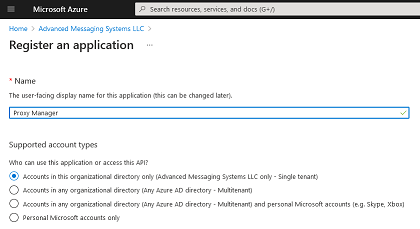
Register Proxy Manager in Azure
Sign in to the Azure portal.
If you have access to multiple tenants, use the Directory + subscription filter  in the top menu to select the tenant where you want to register the application.
Search for and select Azure Active Directory. Under Manage, select App registrations, then New registration. Create a new application. Any name can be used.
 2
2
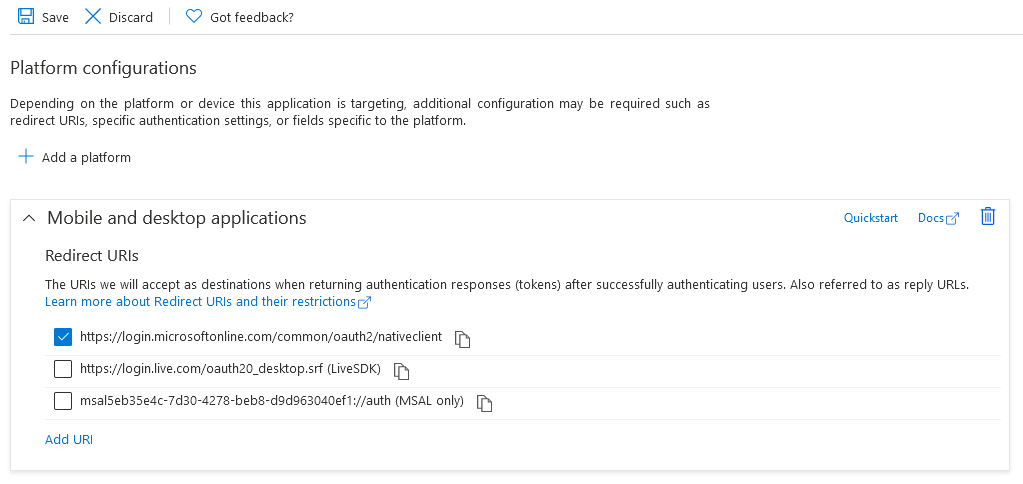
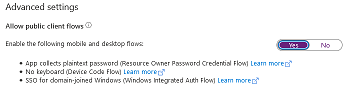
Configure platform authentication
Click Authentication on the left side, click Add Platform, and select Mobile And Desktop Application.
Make sure https://login.microsoftonline.com/common/oauth2/nativeclient is selected as the redirect URI.

In Advanced settings, make sure Allow public client flows is enabled.
 3
3
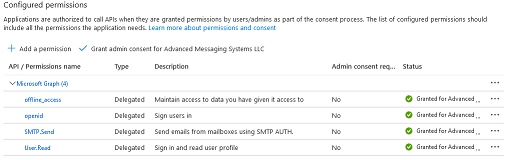
Add API permissions
Click API Permissions on the left side and add the following permissions:
- Microsoft Graph > Delegated Permissions > SMTP > SMTP.Send
- Microsoft Graph > Delegated Permissions > OpenId Permissions > offline_access
- Microsoft Graph > Delegated Permissions > OpenId Permissions > openid
- User.Read, which is granted by default
Click Grant admin consent to avoid the confirmation prompt being shown to the admin user on first use. Non-admin users cannot proceed until the administrator grants permission.
 4
4
Create the OAuth registry profile
On the machine where Proxy Manager is installed, create the registry key in either HKLM or HKCU. With HKLM, each local user defaults to the template values from HKLM, while user-specific cached values, such as the encrypted access token, are stored in HKCU when Proxy Manager saves its configuration.
Create AdvancedMessagingSystems\ProxyMan\OAuthProfiles, then create a domain-specific key. For example, if company email addresses use User@OutlookSpy.com, create a key named OutlookSpy.com. If you have multiple domains, any proxy domain can be used as long as the user has a proxy SMTP address in that domain.
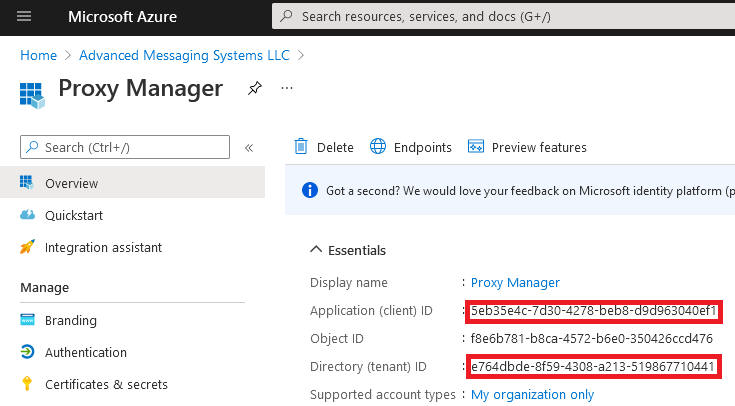
Create string values named client_id, tenant_id, and redirect_url if it differs from the default value. Use the Application (client) ID, Directory (tenant) ID, and redirect URI from the Azure portal.
5
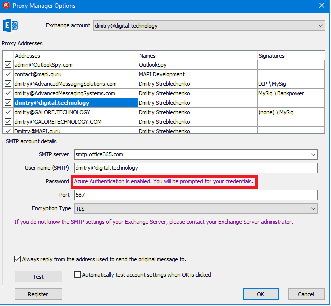
Restart Outlook and confirm OAuth mode
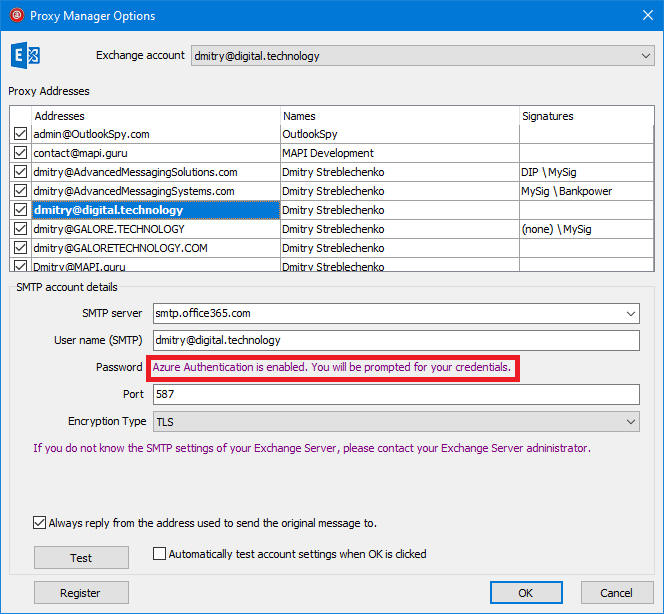
If the registry values were created correctly, after restarting Outlook, the Password edit box in the Proxy Manager Options window is hidden.